3D rendering is the process of transforming 3D models into realistic 2D images or animations, turning digital data into vivid visuals used in films, games, architecture, and product design. By understanding how the rendering workflow, lighting, shading, and image calculations work, every 3D artist and designer can create high-quality, photorealistic results. Modern 3D rendering techniques – from real-time rendering to offline ray tracing – continue to evolve, empowering creators to produce stunning visuals across industries.
In this guide, I will explain what 3D rendering is, break down the rendering process, and explore various techniques for creating high-quality visuals. Understanding the rendering workflow is crucial for 3D artists and designers like me, as it plays a key role in transforming digital data into the stunning images and animations we see in movies, video games, and 3D visualizations. Over time, rendering techniques have evolved to meet the growing demands of the industry, enabling artists like me to create increasingly realistic and captivating visuals.
What is 3D Rendering and What is Its Role?

3D rendering is the final stage of the 3D graphics workflow. It transforms digital 3D models into 2D images or animations, making abstract data into realistic or stylized visuals. Rendering adds depth, color, and realism – it’s the stage when all the elements come together to produce a complete visual representation. It’s not just a phase in production but the culmination of digital artists’ creative and technical efforts.
The purpose of 3D rendering is to create an accurate and compelling visual representation. Whether for an animated character, a building model, or a product concept, digital visualization is the process that turns digital blueprints into tangible, perceivable images or photorealistic images. As a 3D artist, this is the moment when my work becomes visible – an essential part of telling a story or conveying an idea to the audience.
3D rendering serves many purposes across different sectors. In digital art, it enables artists to create realistic images that can evoke emotions or narrate tales. For architectural projects, rendering is the instrument that transforms blueprints into vivid architectural renderings, allowing clients and stakeholders to envision the final result realistically. In animated film production, rendering gives characters and environments their final, polished look with special effects.
The 3D Rendering Process Explained
The rendering process is both complex and creative. It starts with building a 3D model – a numerical representation of a three-dimensional surface. This model acts as the framework for the rendering workflow, containing essential geometric, texture, and shading details. The process requires in-depth knowledge of the underlying data, applying textures and visual effects, and utilizing specialized software and GPU rendering techniques to calculate and produce the final image.
Understanding the Data
The rendering workflow begins with preparing a 3D model – a collection of data that defines the 3D object or scene to be visualized. This data includes the model’s geometry, which describes its shape and measurements. The scene data also involves details such as the position of lights, cameras, and other elements within the 3D scene. The 3D rendering software interprets all this data to determine how the final 2D image should look from the chosen perspective.
It is useful to understand how the data feeds into the rendering engine. Each element, from geometric details to the placement of lights, influences how the final output looks. Above all the software needs to understand what shapes are present and also how these shapes are textured, lit, and viewed from different angles.
Applying Texture and Visual Effect
Once the basic framework is ready, the next step is to apply textures to the model. Textures are the surface details that give a 3D model its color, finish, and fine detail. These can range from simple colors to highly intricate images representing real-world materials. Applying textures is crucial in giving the model a realistic look and feel, ensuring it aligns with the artistic vision.
In addition to textures, visual effects are essential for adding realism and depth to the scene. These effects, such as reflections, refractions, and environmental elements like fog or smoke, help to bring the scene to life. These elements work together to create a more dynamic and engaging visual experience, enhancing the overall mood and atmosphere of the rendered scene.
Image Calculations and Output
The heart of the rendering workflow is in the image calculations. Specialized hardware, such as CPUs and GPUs, is employed to perform complex mathematical computations that simulate the behavior of light within a scene. These calculations consider material properties, how light interacts with surfaces, and the impact of shadows and reflections. This process ultimately defines the quality of the final rendered output, combining lighting, materials, and viewpoint into a unified visual.
The result is a collection of pixels, each with its specific color and brightness, which combine to create the final image. Depending on the type of 3D rendering method used, the computational requirements can be very demanding. For large-scale projects, many artists utilize render farms to speed up the rendering process. Learn more about what a render farm is and how it works.
Based on the desired outcome and used method rendering speed can differ significantly. Offline rendering, for example, can take hours per frame to produce high-quality results, which is why many artists look for ways to render faster, while interactive rendering has to achieve similar results in milliseconds.
Scale Your Workflow
If your project requires massive computational power beyond a local workstation, explore these professional solutions:
• Cloud Render Farm: Fully automated cloud rendering for tight deadlines.
• VFX Cloud Services: Tailored for complex animation and film production.
Key Components in 3D Rendering
Several key components shape the visual rendering workflow, each contributing to converting a 3D model into an appealing image or animation:
- Geometry processing: This component defines the objects’ shapes and prepares them for the rendering workflow. It involves manipulating the vertices, edges, and surfaces that make up the 3D model using 3D modeling software.
- Shading: Shading decides what colors and textures an object receives based on its material properties, light sources, and the viewer’s position. Shaders are algorithms that determine how light interacts with a surface, influencing its final appearance.
- Lighting: Simulating light sources and calculating how they interact with the objects in a scene is essential to producing realistic visuals, helping 3D artists and designers create compelling visual effects. It defines the scene’s ambiance and affectsthe overall mood and quality of the image.
- Rasterization or Ray Tracing are the two main techniques for converting a 3D scene into a 2D image. Rasterization is generally used in interactive rendering, while Ray Tracing produces more realistic images by simulating the path of light rays.
- Post Processing: After the initial rendering, additional effects, such as color correction, blurring, and depth of field, are applied to enhance the final image. These post-processing steps help in achieving the desired visual style.
All these components must work together to produce a cohesive final image that can be used in various industries, from architectural visualization, 3D modeling, video editing, and computer graphics to animated films, graphic design, and interior design.
Different Types of 3D Rendering
Rendering can be categorized into two main types: Real-Time Rendering and Offline Rendering (or Pre-Rendering). Each has its specific use case, depending on the project’s requirements.
Real-time Rendering Explained
Interactive rendering is used primarily in applications like video games, simulations, virtual reality, and video rendering. In these contexts, images must be created on the fly as the user interacts with the environment.
Real-time rendering focuses on speed and efficiency, ensuring that the rendered image keeps up with user interactions.
Real-time rendering poses a unique challenge: to balance image quality and processing speed. The rendering has to occur within milliseconds to maintain the illusion of a smooth experience. Therefore, optimizing models, using simplified textures, and pre-calculating elements like shadows are best practices to maintain efficiency.
For me, interactive rendering is all about immediacy and feedback. The idea is to create a visually appealing experience without noticeable lag or frame drops, ensuring seamless gameplay or interaction. GPU servers plays a vital role here, handling the heavy computational requirements to keep everything running smoothly.

Offline Rendering Explained
Offline rendering is preferred for achieving the highest level of realism and visual quality, especially when time constraints are not a factor. This type of rendering is used most commonly in animated movies, visual effects, video editing, and architectural visualization.
Offline rendering does not need to produce frames instantly, allowing far more detailed calculations regarding lighting, textures, and other visual effects. For instance, Ray Tracing is often used in offline rendering to achieve photorealistic images by accurately simulating how light interacts with surfaces.
In offline rendering, the emphasis is on creating lifelike, high-quality images almost indistinguishable from real photos. The computational power needed for 3D scene processing can be crucial, often involving CPUs and GPUs working in parallel. This is where cloud render farm services step in, providing the essential computational resources for render-intensive workflows.

3D Rendering Techniques
There are multiple ways to render a scene, including photorealistic and non-photorealistic approaches. Mastering the right techniques can make a huge difference in your final output. If you’re working with Blender, check out this detailed guide on How to Render in Blender to optimize your rendering process.
Some common rendering classifications include:
- Photorealistic rendering: a scene that could be determined as a photograph of something in the real world. It uses complex calculations so that the light, textures, and materials result in a highly realistic image.
- Non-photorealistic rendering (NPR): This style often applies in a pure sense of art, such as in architectural designs or digital art, where the goal is to invoke certain styles or emotions rather than imitating reality.
- Volume rendering: This technique is most apparent in medical imaging and scientific visualization. It works on volumetric data to produce a 3D representation from a dataset.
Each visual rendering technique serves a unique purpose, whether it’s achieving lifelike images, enhancing artistic expression, or visualizing complex 3D data.
3D Rendering Applications in Different Industries
Computer-generated visuals is not just about creating stunning images; it’s also a crucial tool across various industries.
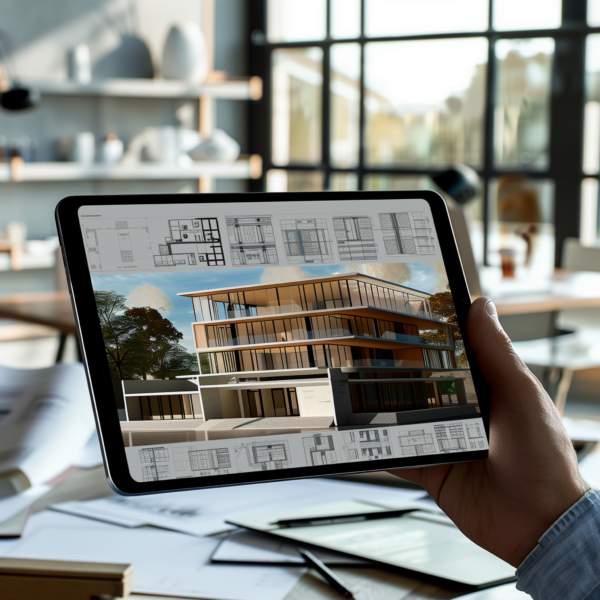
- Architecture: Rendering turns blueprints into immersive visualizations. Clients can see how a building will look before construction begins, aiding decision-making. 3D-rendered images significantly enhance architectural design and interior design, providing a detailed view of the finished product.
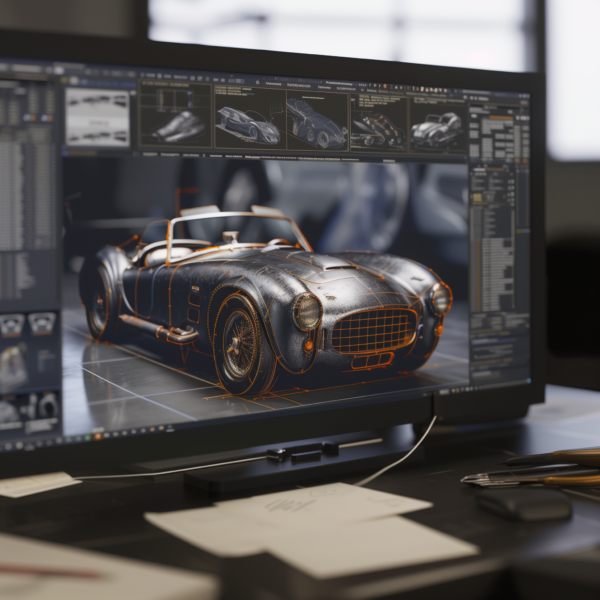
- Automotive: Rendering helps create visuals of new vehicle models, allowing designers and engineers to iterate on designs before moving to production.
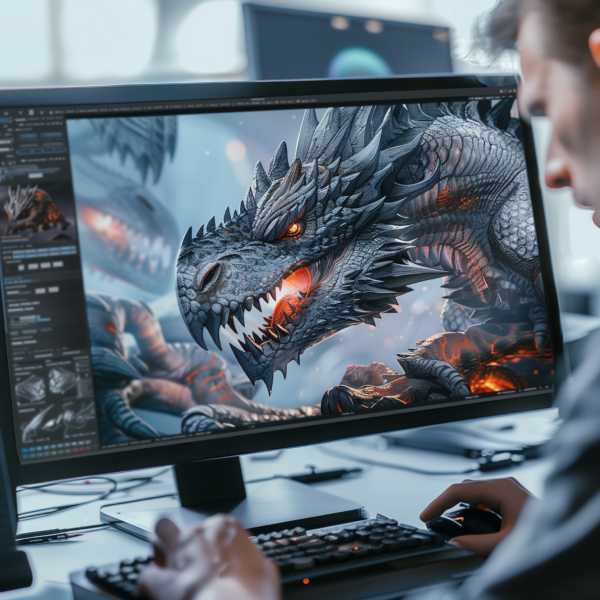
- Entertainment: 3D rendering is the backbone of visual effects and animation. It brings animated characters to life and adds visual magic to movies and video games. If you’re interested in adding breathtaking visuals to your projects, take a look at VFX cloud rendering services.
- Product Design: create realistic images of products before their production, enabling companies to display products and start marketing campaigns in the very beginning before production goes ahead.
- Web Development and Graphic Design: Rendering helps create dynamic visual content for websites and promotional materials, supporting marketing and user experience.
Future Trends in 3D Rendering
The future of visual computing looks exciting, with advancements in technology promising to make the process faster and more efficient. Artificial Intelligence (AI) and Machine Learning (ML) are increasingly being integrated into rendering workflows, helping improve performance and automate certain aspects of the process.
AI-based denoising, for example, can significantly speed up rendering by reducing noise in partially rendered images, cutting down on rendering time. Machine learning algorithms can predict and optimize rendering outcomes by learning from vast datasets, leading to faster and more accurate results.
Another significant trend is the shift towards cloud rendering. Dedicated cloud servers provide access to powerful rendering capabilities without investing in expensive local hardware. Cloud providers offer scalability and flexibility, making it an excellent solution for large-scale projects or additional computational power on demand.

MaxCloudON: At the Forefront of Cloud Rendering
MaxCloudON stands out as a cloud provider, particularly with unshared cloud servers that cater to heavy computational needs. Their CPU and GPU render nodes are ideal for high-performance 3D image generation tasks. The flexibility to install any 3D render software, custom scripts, and plugins via remote access (WebRDP and WebSSH) makes it a versatile choice for professionals who need reliable cloud infrastructure.
The Benefits of Cloud Render Nodes
There are numerous benefits of cloud rendering, here are only some:
- Scalability: They can handle projects of any size, allowing me to scale up render resources as needed.
- Cost-Effectiveness: Eliminates the need to maintain personal hardware, which can be costly.
- Collaboration: Collaborate with teams worldwide, as all project files and resources are accessible remotely.
Conclusion: The Purpose and Power of 3D Rendering
Rendering is an intricate yet essential process that brings digital creations to life. Whether working on a simple visual or a complex animation, understanding the rendering workflow – from data preparation to the final image – is crucial. The choice between real-time and offline rendering depends on your project needs.
With technological progress, especially AI and cloud computing, rendering is becoming more efficient and accessible, providing better tools for VFX artists, architects, and interior designers. Cloud providers like MaxCloudON allow me to access the computational power I need without investing in local hardware. I can create without limits and focus on creativity with RenderSonic automation, effectively removing the technical ‘grind’ from my workflow.
At its core, rendering is what takes my 3D models and digital data and turns them into something real – vivid, perceivable images that convey my creative vision to the world.
Sources:
- ACM Digital Library
- NVIDIA Developer Blog
- Autodesk Official Page
- Blender Official Page
- V-Ray Official Page
- CG Geek
- Blender Guru
- V-Ray Official Channel
- Physically Based Rendering: From Theory to Implementation by Matt Pharr, Wenzel Jakob, and Greg Humphreys
- Fundamentals of Computer Graphics by Steve Marschner and Peter Shirley
Frequently Asked Questions
What is 3D rendering used for?
3D rendering is utilized in diverse areas such as video games, simulators, film or visual effects, architectural visualizations, interior design, and virtual reality. It allows generating images or animations that can visually depict designs, concepts, or ideas.
What is the purpose of rendering?
The purpose of 3D rendering process is to create high-detail and realistic pictures and animations, which would be impossible to process using any other traditional ways. It is the cornerstone of digital art, animation, and visual effects, providing the power to bring into existence what only the mind can see. For architectural design, video editing, and animation industries, rendering isn't just important - it's a must-have. It helps visualize how a final product will look, aids in design decisions, and is used for marketing or presentation purposes.
What hardware do I need for 3D rendering?
You will need a powerful CPU (AMD or Intel), a high-end GPU (e.g., NVIDIA RTX series), 16-32GB RAM, and an SSD for fast storage. Adequate cooling is also important for long scene processing or rendering sessions, especially for offline rendering workflows.
How do lighting and textures affect rendering quality?
Lighting creates shadows, highlights, and mood, adding depth and realism. Textures provide surface details like color and roughness, making objects appear more realistic. Together, they are crucial for achieving high-quality, lifelike rendered output.
What software is commonly used for rendering?
Popular 3D rendering software includes Blender (Cycles, Eevee), Autodesk Arnold, Chaos V-Ray, KeyShot, Redshift, and Lumion - each has its unique features for different visual rendering needs, from filmmaking to architectural design.